
Composting at Home: Turning Kitchen Scraps into Garden Gold

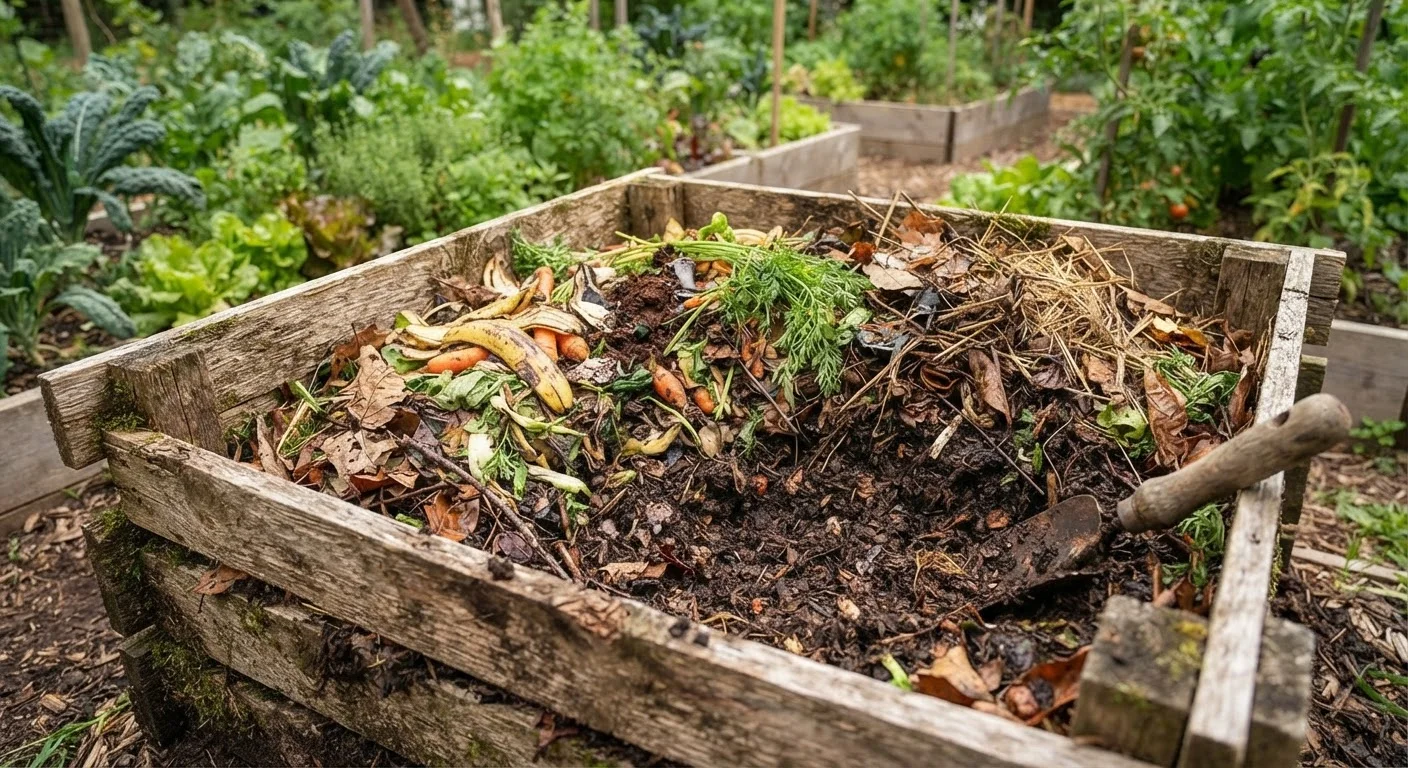
Photo: faqsvault.com editorial
Key Takeaways
- Successful composting requires a balance of carbon-rich 'browns' and nitrogen-rich 'greens' in roughly a 3:1 ratio.
- Meat, dairy, and oily foods should be kept out of a standard backyard compost pile.
- Turning the pile regularly and maintaining moisture speeds up decomposition significantly.
- Finished compost improves soil structure, drainage, and nutrient availability for plants.
- Even a small bin on a patio or balcony can handle most household food scraps effectively.
What Composting Actually Does for Your Garden
Composting is the controlled breakdown of organic matter by microorganisms, fungi, and invertebrates into a dark, crumbly material called humus. When worked into garden beds, this finished compost improves soil in ways that synthetic fertilizers simply cannot replicate — it enhances drainage in clay-heavy soils, helps sandy soils retain moisture, and steadily releases nutrients as plants need them.
For gardeners building productive outdoor spaces, compost is one of the most cost-effective soil amendments available. It reduces the need for store-bought fertilizer, cuts down on food waste headed to landfill, and creates a genuinely closed loop between your kitchen and your garden. If you're starting a vegetable garden from scratch, getting a compost system going early means you'll have rich material ready by the time your beds need it most.
Understanding the biology behind composting helps you troubleshoot problems before they stall your pile. Microbes need four things: carbon, nitrogen, moisture, and oxygen. Get those four factors in balance, and decomposition happens reliably — often within eight to twelve weeks under good conditions.
What to Add and What to Leave Out
Compostable materials fall into two broad categories. Browns are carbon-rich: dry leaves, cardboard torn into small pieces, straw, paper bags, and woody prunings. Greens are nitrogen-rich: vegetable and fruit scraps, coffee grounds, tea leaves, fresh grass clippings, and plant trimmings. Aim for roughly three parts browns to one part greens by volume. Too many greens and the pile becomes slimy and smelly; too many browns and it dries out and stalls.
Materials to compost with confidence include:
- Fruit and vegetable peelings and cores
- Coffee grounds and paper filters
- Eggshells (they break down slowly but add calcium)
- Dry leaves and garden trimmings
- Plain cardboard and newspaper (shredded or torn)
- Grass clippings (in thin layers to prevent matting)
Materials to keep out of a standard open compost pile:
- Meat, fish, and bones — attract pests and create odor
- Dairy products and cooked fatty foods — same reasons
- Diseased plant material — pathogens may survive if the pile doesn't heat up sufficiently
- Pet waste — can carry harmful pathogens
- Treated or painted wood — may contain chemical residues
Keep Diseased Plants Out of Your Pile
Citrus peels and onion skins are fine in moderation, though large quantities can slow decomposition. Avoid adding invasive weeds that have gone to seed, as home compost piles may not reach temperatures high enough to kill viable seeds.
Setting Up Your Composting System
Before you start piling scraps, decide which composting format suits your space and household volume. Three common options work well for most home gardeners:
- Open bin or heap: The simplest approach — a DIY wood-pallet enclosure or a purchased plastic bin placed on bare soil. Good airflow speeds decomposition.
- Tumbler: A sealed rotating drum mounted above the ground. It heats up faster, deters rodents, and is easier to turn, though it holds less volume.
- Worm bin (vermicomposting): Uses red wiggler worms to process scraps in a compact container — ideal for apartments, patios, or anyone with limited outdoor space. The resulting worm castings are exceptionally rich.
Placement matters. Outdoor bins do best on level ground with direct soil contact (to allow drainage and encourage beneficial organisms to enter), in a spot that gets partial sun. Full shade slows the process; full sun dries the pile too quickly.
If you're growing food in a tight space, a worm bin is especially worth considering — see our guide to growing food in small spaces for more ideas on compact garden setups.
Choose and position your bin or heap
Select a composting method that fits your available space — a freestanding bin, a DIY enclosure, a tumbler, or a worm bin. Place outdoor bins on bare soil in a partially sunny spot with easy access from the kitchen. Avoid locations directly against a fence or wall, as you'll need space to turn the pile.
Build your first layers
Start with a base layer of coarse browns — straw, wood chips, or torn cardboard — about 4–6 inches deep. This creates drainage and airflow from the bottom. Add a layer of greens on top, then cover with another layer of browns. This 'lasagna' approach establishes the right carbon-to-nitrogen ratio from the start.
Add kitchen scraps correctly
Each time you add fresh kitchen scraps (greens), bury them in the center of the pile and cover with a layer of browns. Leaving scraps exposed on the surface invites flies and rodents. Alternate additions keep the pile balanced and reduce odor.
Maintain moisture and aeration
The pile should feel roughly as moist as a wrung-out sponge — damp throughout but not waterlogged. During dry spells, water lightly with a hose. In heavy rain, cover with a tarp to prevent saturation. Turn the pile every one to two weeks using a garden fork, moving material from the outside edges toward the hot center.
Know when it's ready and how to use it
Finished compost is dark, crumbly, and smells like forest soil — not like the original scraps. Screen out any large unfinished chunks and return them to the active pile. Apply finished compost to garden beds before planting, top-dress around established plants, or blend into potting mixes for containers. Use it within the same growing season for best results.
Troubleshooting and Using Finished Compost
Even a well-managed pile runs into occasional issues. Here's how to read the signs and correct course:
| Problem | Likely Cause | Fix |
|---|---|---|
| Pile smells like ammonia | Too many greens / nitrogen excess | Add more browns; turn to aerate |
| Pile smells rotten or swampy | Too wet or compacted | Turn the pile; add dry browns |
| Nothing is breaking down | Too dry or too many browns | Add water; incorporate fresh greens |
| Pests or rodents attracted | Food scraps exposed on surface | Bury scraps in the center; use a lidded bin |
Compost is finished when it smells earthy, looks uniformly dark and crumbly, and the original materials are no longer identifiable. Spread it 1–2 inches deep over garden beds before planting, or mix it into potting soil at roughly 25–30% by volume. It pairs particularly well with a mulching routine, since compost feeds the soil while mulch protects it from above.
Compost tea — made by steeping finished compost in water — can also be applied as a liquid feed, though results vary and it should be used soon after brewing. For edible gardens, finished compost is one of the safest, most reliable soil amendments available, and it complements natural pest control strategies by building resilient, biologically active soil.
All published content on this website is for informational and educational purposes only and should not be taken as professional advice. We recommend that readers seek expert opinion before making any decisions. The website is not responsible for any actions taken based on the information provided on this website. We are not liable for any inaccuracies, modifications, or omissions in information. Moreover, external links or third-party content are provided for convenience; we are not liable for their correctness. Users are advised to verify every piece of information before they use it for any purpose.