
Gallery Walls Done Right: Planning, Spacing, and Hanging Without Regret

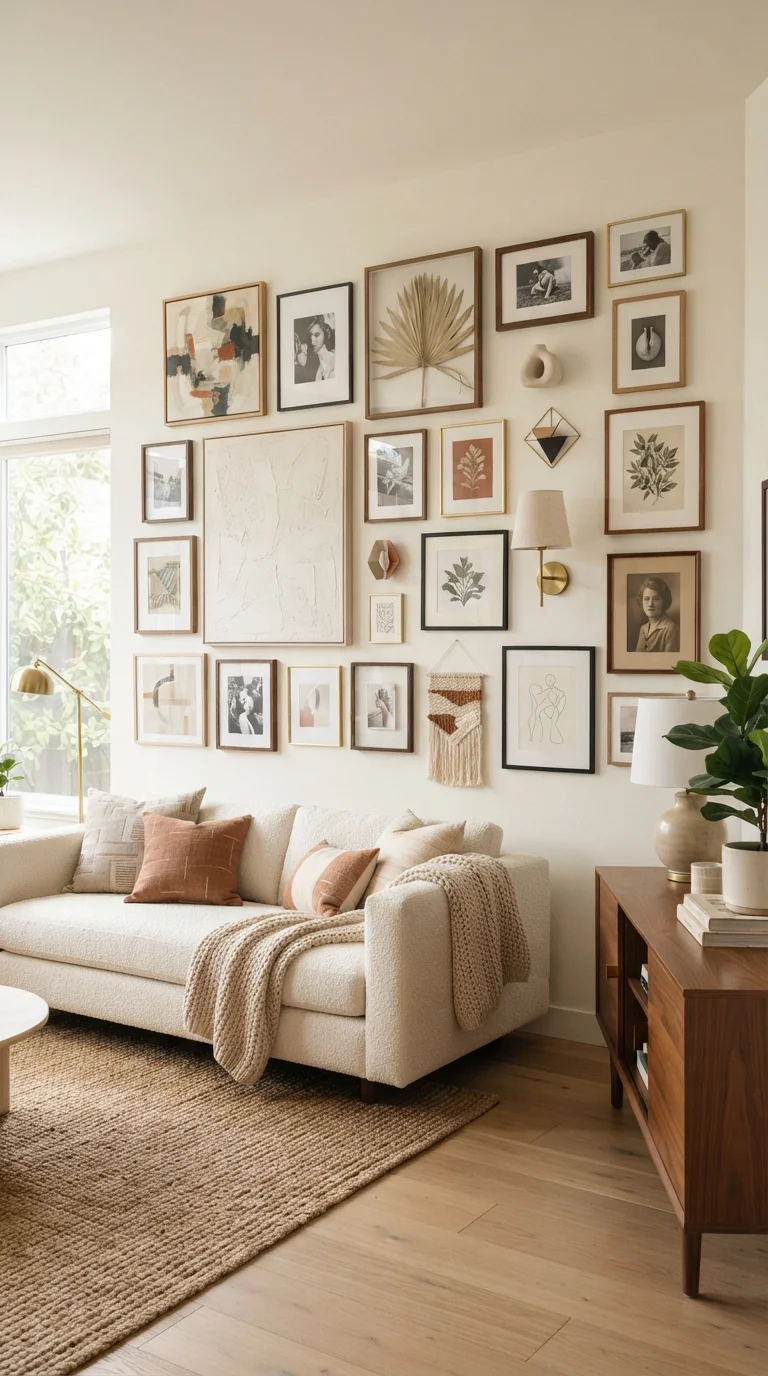
Photo: faqsvault.com editorial
Key Takeaways
- Plan your layout on the floor or with paper templates before driving a single nail.
- Maintain consistent spacing — typically 2 to 3 inches between frames — for a cohesive look.
- A mix of frame sizes works best when anchored by one or two larger statement pieces.
- Eye-level center point (around 57–60 inches from the floor) is the standard hanging benchmark.
- Repeating one element — color, frame finish, or mat style — unifies even eclectic collections.
- Testing your arrangement with painter's tape or kraft paper saves walls from unnecessary holes.
Why Gallery Walls Go Wrong — and How to Avoid It
A gallery wall is one of the most personal decorating moves you can make. Done well, it tells a story, fills a room with warmth, and reflects years of collected moments. Done poorly, it can look haphazard — frames crammed together, sizes clashing, the whole arrangement drifting awkwardly on the wall.
The good news: most gallery wall regrets stem from skipping the planning phase, not from poor taste. Before you commit to any arrangement, it pays to understand what makes a wall feel considered rather than chaotic. If you're working through a broader room refresh, our room planning checklist is a useful starting point for measuring your space and identifying constraints.
The core principles are straightforward: visual weight, consistent spacing, and a unifying element. A gallery wall doesn't need to be perfectly symmetrical, but it does need an internal logic the eye can follow. That logic is what this guide will help you build — step by step, before a single nail goes in.
One Unifying Element Goes a Long Way
What You'll Need Before You Start
Gathering your materials ahead of time keeps the process smooth and reduces the chance of mid-project frustration.
What you will need
Tape measure
Measure the wall area and individual frame dimensions to plan spacing accurately.
Painter's tape
Mark frame outlines directly on the wall to visualize the arrangement before hanging.
Kraft paper or newspaper
Trace and cut frame templates to simulate the final layout on the floor or wall.
Level
Ensure each frame hangs straight and the overall row alignment stays even.
Hammer and picture nails
Drive hanging hardware into the wall at planned positions.
Wall anchors
Provide secure hold for heavier frames in drywall where a stud isn't available.
Pencil
Mark nail positions lightly on the wall — marks are easily erased or covered.
Step-by-Step: From Blank Wall to Finished Display
Follow these steps in order. The early planning stages may feel slow, but they're what separates a polished result from a wall full of patched holes.
Measure the wall and define your boundaries
Use your tape measure to record the width and height of the wall section you're working with. Note any architectural features — light switches, outlets, door frames, or windows — that will affect your usable area. Sketch a rough rectangle on paper with these dimensions; this becomes your planning canvas.
Decide whether you want the gallery to span the full wall or anchor to a specific zone, such as above a sofa or along a staircase. Defining boundaries upfront prevents the arrangement from creeping too wide or sitting awkwardly off-center.
Gather all pieces and sort by size
Bring every frame, canvas, and wall object you're considering into the room. Lay them out on the floor in roughly the space you're working with. Sort them loosely by size — large, medium, and small — and take stock of what you have.
A well-balanced gallery wall typically includes one or two anchor pieces (the largest), several mid-size frames, and a handful of smaller items to fill gaps. If your collection skews heavily to one size, consider adding variety before moving forward.
Experiment with arrangements on the floor
On the floor, arrange your pieces within a taped-out rectangle matching your wall dimensions. Start by placing your largest anchor piece slightly left or right of center — perfect symmetry tends to look rigid. Build outward from there, balancing visual weight across both sides.
Keep spacing consistent as you work: 2 to 3 inches between frames is a standard that reads as intentional without feeling cramped. Photograph the arrangement from a standing height before moving anything — this gives you a reference image to recreate on the wall.
Create paper templates and test on the wall
Trace each frame onto kraft paper or newspaper and cut out the shapes. Label each template with the frame name or a number corresponding to your floor plan photo. Tape the templates to the wall using painter's tape, recreating your floor arrangement as closely as possible.
Step back — ideally to the distance from which you'd normally view this wall — and assess. Adjust any templates that feel off. This is the moment to move things freely; it costs nothing.
Mark nail positions and hang frames
Working from your templates, mark the nail position for each piece with a light pencil dot — remember that the nail sits above the hanging hardware on the back of the frame, not at the top edge. Most frames have a wire or sawtooth hanger; measure the distance from the frame top to the hanging point on the back, then subtract that from the template's top edge to find the nail height.
Use a level on each frame as you hang it, and check the overall row alignment periodically. For heavier pieces, locate a wall stud or use appropriate anchors rated for the weight. Once all frames are hung, remove any visible pencil marks and stand back to review.
Review, adjust, and refine
Once everything is on the wall, live with the arrangement for a day before declaring it finished. Lighting at different times of day can reveal spacing issues or frames that feel out of place. Make small adjustments as needed — shifting a frame an inch or swapping two pieces can meaningfully change the composition.
If the finished wall is part of a larger renovation or decorating project, check it against your overall room plan. Our room-by-room home renovation checklist can help you track how this element fits into the broader picture.
Troubleshooting Common Gallery Wall Problems
Even careful planners run into snags. Here are the most common issues and how to address them.
The arrangement looks too sparse
If the wall feels underpopulated after hanging, the most effective fix is adding smaller filler pieces — ceramic wall objects, small botanical prints, or decorative mirrors — rather than spreading existing frames further apart. Spreading increases the sense of disconnection.
The wall reads too busy or cluttered
This typically means too many frames of similar size with no anchor piece, or inconsistent spacing. Step back and identify your largest, most visually dominant piece. Everything else should feel like it's in conversation with that centerpiece. Consider removing two or three pieces and testing the wall with the remainder before adding anything back.
Frames feel mismatched in a distracting way
Variety in frame style is intentional and appealing — but without a linking element, it can feel random. Introduce one common thread: all frames in black or natural wood, consistent white or cream mats, or artwork that shares a color palette. That single repetition does a surprising amount of work. For a deeper look at decorating missteps that unsettle a room, see our article on common decorating pitfalls.
The arrangement doesn't suit the room
If a gallery wall still feels off after careful hanging, it may be a room-scale issue rather than an arrangement issue. Long, horizontal galleries suit wide walls and low-ceilinged spaces. Tall, portrait-style clusters draw the eye upward and work well in rooms with high ceilings or narrow walls. Consider the room's proportions as a whole — our guide to decorating compact rooms covers how scale choices affect the overall feel of a space.
All published content on this website is for informational and educational purposes only and should not be taken as professional advice. We recommend that readers seek expert opinion before making any decisions. The website is not responsible for any actions taken based on the information provided on this website. We are not liable for any inaccuracies, modifications, or omissions in information. Moreover, external links or third-party content are provided for convenience; we are not liable for their correctness. Users are advised to verify every piece of information before they use it for any purpose.